Star Watermark
Protect your photos and PDFs with easy watermarking on Mac and Windows
How to Watermark Photos on macOS
Protect Your Photos with Star Watermark for Mac
Adding watermarks to your photos is a great way to protect your intellectual property and brand identity. With Star Watermark for Mac, you can easily add text or image watermarks to your photos, individually or in batches. This free software offers a user-friendly interface and robust features. Follow this step-by-step guide to watermark your photos on macOS!
Why Watermark Your Photos?
Watermarking helps prevent unauthorized use of your images and promotes your brand. Star Watermark for Mac provides:
- Customizable text and image watermarks (size, color, position, rotation).
- Batch processing to watermark multiple photos at once.
- Preview options to ensure perfect results.
- Free version with powerful features.
Step-by-Step Guide to Watermark Photos
Step 1: Launch Star Watermark
Download and install Star Watermark for Mac. Double-click the Star Watermark icon in the Applications folder to start the program.
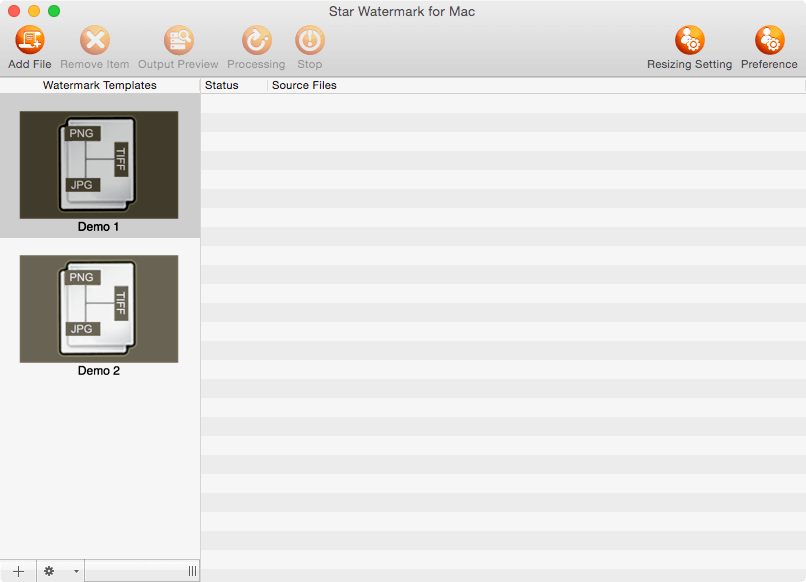
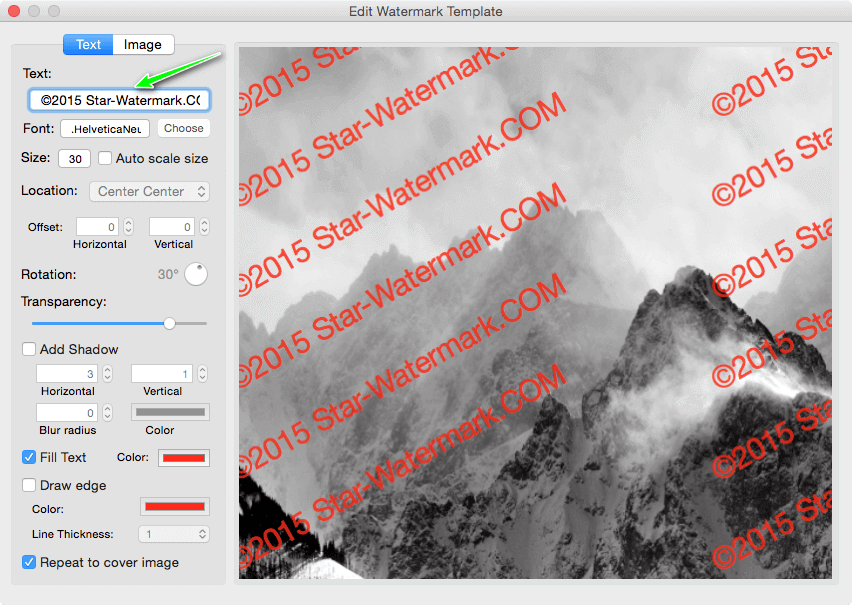
Step 2: Edit Your Watermark Template
Double-click “Demo1” or “Demo2” on the left, or select “Add Template” to open the “Edit Template” dialog. Customize your watermark:
- Text Watermark: Set text content, font, size, color, position, angle, and shadow.
- Image Watermark: Add a logo or image, adjust position, and rotate as needed.
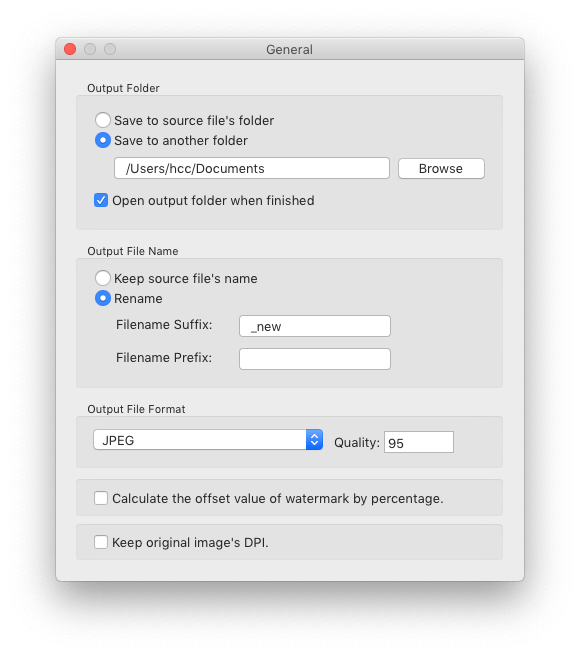
Step 3: Set Output Options
Click “Preferences” on the toolbar to open the control panel. In the “General” tab, configure the output directory, file suffix (e.g., “_watermarked”), and output format (e.g., JPEG, PNG).
Step 4: Add and Process Photos
Add photos in two ways:
- Click “Add Files” on the toolbar to browse and select photos.
- Drag and drop photos into the program interface.
Preview the watermark by clicking “Output Preview” or double-clicking a file. When ready, click “Start Processing” to apply the watermark to all selected photos.

Step 5: View Watermarked Photos
After processing, the output folder opens automatically. Check the watermarked photos, named with the suffix set in Preferences. You can also find the output folder via the “Preferences” panel.
Tips for Effective Watermarking
- Balance visibility and aesthetics: Place watermarks strategically to protect images without obstructing key content.
- Use batch processing: Save time by watermarking multiple photos at once.
- Preview results: Always preview watermarks to ensure they look good on all images.
- Backup originals: Keep unedited copies of your photos.
Additional Resources
- Watch Star Watermark for Mac Video Tutorial on YouTube
- How to Register Star Watermark for Mac
- Star Watermark Ultimate: Add Multiple Watermarks
- Star Watermark Ultimate: Use Gradient Color for Text Watermarks
- How to Add Text Watermarks to Photos
- How to Add Image Watermarks to Photos
- Batch Watermarking with Star Watermark for Mac
- How to Add a Copyright to Your Image
Frequently Asked Questions (FAQ)
- Is Star Watermark for Mac free?
- Yes, the free version includes robust watermarking features. For advanced options, try the Pro version.
- Can I watermark PDFs?
- Yes, use Star PDF Watermark for Mac.
- Does Star Watermark support Windows?
- Yes, check out Star Watermark for Windows.
- How do I remove watermarks?
- Star Watermark is designed to add watermarks. For removal, consider professional editing tools or contact support for guidance.
Get Started Today
Protect your photos with Star Watermark for Mac. Download now and start watermarking in minutes!
Need help? Visit our tutorials or contact support.