Star Watermark
Picture and PDF watermark tools on Windows PC and macOS
How to Make a Watermark on macOS
Create Beautiful Watermarks with Star Watermark for Mac
Star Watermark for Mac makes it easy to create professional and visually appealing watermarks for your photos. This tutorial guides you through designing a watermark with the right font, size, and style using the free version, compatible with macOS 10.15+.
Steps to Make a Beautiful Watermark
-
Download Star Watermark
Download Star Watermark Free and install it on your Mac.
-
Create a Watermark Template
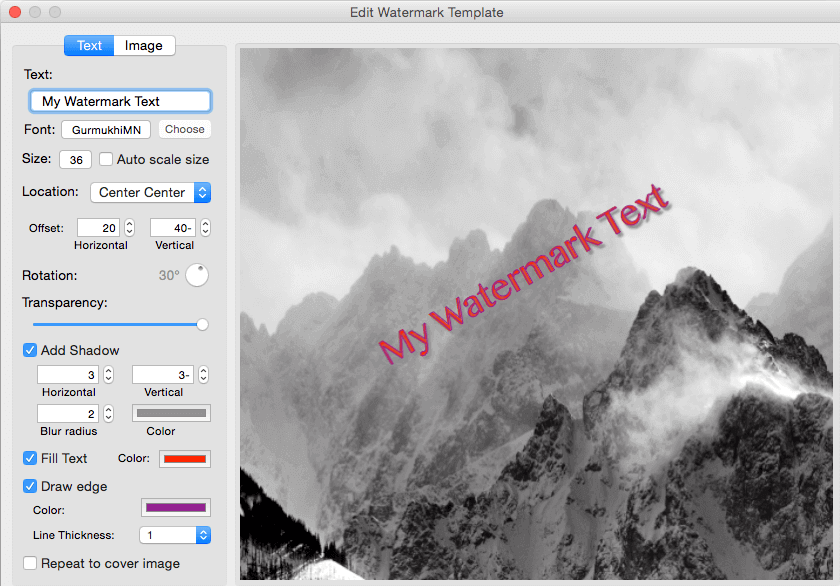
Launch the app and create a new template. Add text (e.g., “© YourName”) or a logo. Use the “Choose” button to select a font and adjust size manually or via the font dialog.
-
Customize Style
Experiment with fonts (e.g., Helvetica, Arial) and sizes (e.g., 12-24pt). Adjust color and angle to match your brand. See examples of different styles below.

-
Adjust Transparency and Position
Set transparency (50-70% recommended) and drag the watermark to a corner or center for optimal placement.
-
Apply to Photos
Add photos, preview the watermark, and click “Process” to save watermarked images with a “_new” suffix.
Free Download Purchase Pro View Gallery
Tips for Beautiful Watermarks
- Choose Readable Fonts: Use clean fonts like Helvetica or Times New Roman for clarity.
- Balance Size: Avoid oversized watermarks that distract from the photo.
- Test Styles: Try multiple font and color combinations to find the best look.
Frequently Asked Questions
Can I save watermark templates? Yes, save templates for reuse in future projects.
Does the free version limit font choices? No, you can use any system font in the free version.
How do I make watermarks less intrusive? Lower transparency and place in corners.
For more help, visit our Support Center or Contact Us.